
Especially the boring ordinary ones. All Great Western so far.
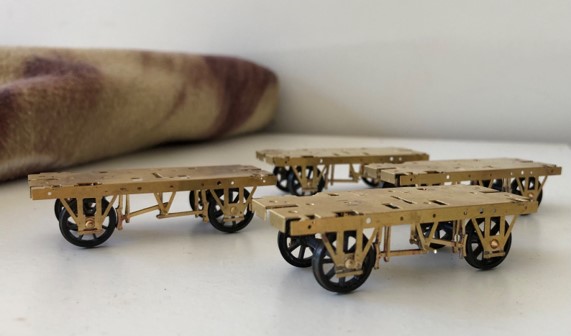
Like a good many of us, I spent far to long as an armchair modeller until reality kicked in. At that point I decided to get a move on, and whilst I am hardly prolific, I am making some headway. My modelling interests centre around early 1920s GWR and my intention is to model one of the smaller stations on the Didcot, Newbury and Southampton line. I am interested in the early 1920s means that the RTR world is not really my oyster. I can use some things, but I have made a point of not buying RTR unless it genuinely fits my era. This means kit building and (eventually) scratch building for me. After my first couple of wagons, I realised that I needed to standardise my approach and simplify the build wherever possible. At the same time, I still need to be happy with the outcome. No point doing something if you are not happy with it is there?
Standardising your approach – Wagon kits.
With my efforts to standardise my approach, I usually only use the body of the kit and discard the other parts. Not all kits are bad, the Parkside ones in particular have pretty decent brake gear but I can build the brass brake gear in not too different a timespan to what it takes to modify the plastic items.
Underframes
I decided quite a while back that assembling individual brass brake gear parts take a lot of time and is not an approach I have the focus for. I like multiples of common wagons (though I do not like batch building) so being able to build them up sort of quickly is important. To this end, whenever possible, I will use a complete underframe kit. Typically, they are newer than the brake gear etches, and they have everything you need. My favoured ones for GWR wagons are the Morgan Design range (available from Scalefour stores) and the Brassmasters sprung underframes for the PO wagons. The Brassmasters range has an underframe that is suitable for the 1907 RCH spec which is important for my era. The 1923 RCH underframe is available from Brassmasters and Scalefour stores.
Detail parts.
Recently I have started using 3D printed buffer housings and springs and axle boxes. I must admit that while I am not sold on 3D printed wagon kits (yet), I do find these detail parts rather good. Only some types are available – Mousa Models and Guy Rixon. A more comprehensive range of buffers is available from Lanarkshire Model and Supplies, with Dart Castings being an alternative supplier. I have been using Exactoscale draw hooks and 3 link couplings however the links do not seem to be available, so I have started using the 3 link couplings from Brassmasters. They are a little larger than the Exactoscale ones but seem to be pretty good from my limited use. They will become my new standard.
Building a wagon.
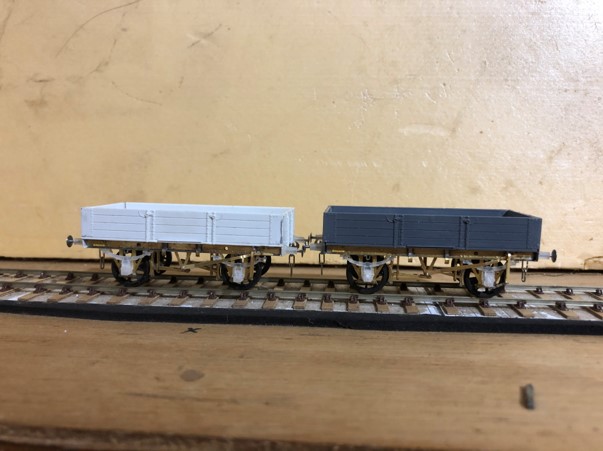
To refresh myself on building wagons, I decided to build a batch of 4 plank wagons. These used the following parts:
- Coopercraft sides and ends
- Morgan Design WN4440 underframe and WN4640 Solebar.
- Mousa Models GWR OK Axleboxes , springs and buffer housings
- Drawhook and couplings of choice.
- Evergreen 4080 styrene sheet for floor.
- Buffer heads – 12” from Wizard Models
- Wheels and bearings to choice – I prefer waisted bearings.
The Morgan underframe.
The Morgan Design range is quite extensive and using them it is possible to cover the majority of GWR wagons. The instructions are massive and a little verbose in parts. I have laminated them and keep them in a folder. To avoid distraction, I remove the relevant pages and keep them close to hand.
The 4-plank wagon underwent a few changes over the years, so it is worthwhile deciding on what you are building from the start. For my period of interest, I only require single sided brakes. Remove the main underframe etch and remove the extra V hanger if so required then drill out the holes as needed. Folding up is fairly simple, I tend to use a steel rule and a hold and fold. It does not hurt to run a little solder down the seams. I also enlarge the openings on the headstocks to allow more room for the buffers.
After folding up the W-irons, check the fit of the bearings. What is important here is to reduce the slop so when you assemble the fixed end check the side play on the axle. Washers are etched on the sheet to assist. Don’t forget that there can be variation between different brands. One other very important thing to check is the bearings themselves. A while back I purchased a few packs of Markits bearings that had a flat at the end of the cone. The wheelset wobbles badly. I thought I had disposed of them all but found a stray one in this build.
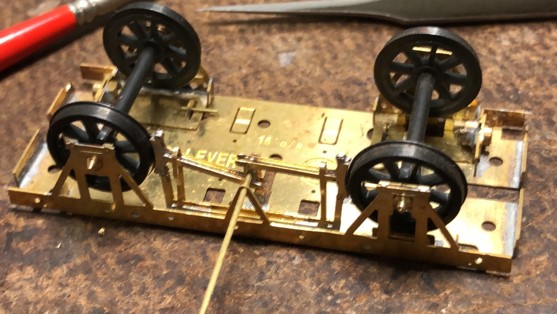
Building up the sprung end is not hard. Simply slot the wire in and secure with Araldite. Or solder if you are impatient like me. When assembling, check the fit as you go and a few checks on a length of track are useful. The sprung end will usually sit higher and this is where the screw adjustment and weighting come into play. I usually leave the screw adjustment in place however I am beginning to think that soldering the whole thing up is more practical. If you are not careful with the screw adjustment it is possible to angle the w-iron slightly.
The solebars are worth adding at this point. Remove the parts from the etch and fold up the channel. Make sure the channel is folded correctly, if it is not you will have some fun and games fitting the door bang springs. A hold and fold is very useful for this. Clean up the overlay and slide it in position, ensuring it is correctly aligned. Tin the overlay and apply a good amount of flux. A good hot iron will give a satisfying sizzle and make no mess to clean up.

One of the features of the 4 plank wagons is the door bang springs. Very few of the 3 plank wagons had bangs and springs while the 4 plank wagons use a far shorter one than later wagons. I make these from the door bangs provided. Fold the section that goes through the solebar and then cut it to provide a flat strip on the solebar. File to ensure an accurate fit and then push through the solebar and solder from the back – trim to be flush with the back of the solebar. To do the curved section, trap the strip under a toothpick and bend around leaving a straight section at the end. Lay the solebar on the flat and put the curved section in position on the spring section of the solebar. Hold it is position and make a quick application of solder. Hopefully(!) it will be in the correct position and you can cut to length. A bit of faffing around but I could not get a consistent bend in one piece.
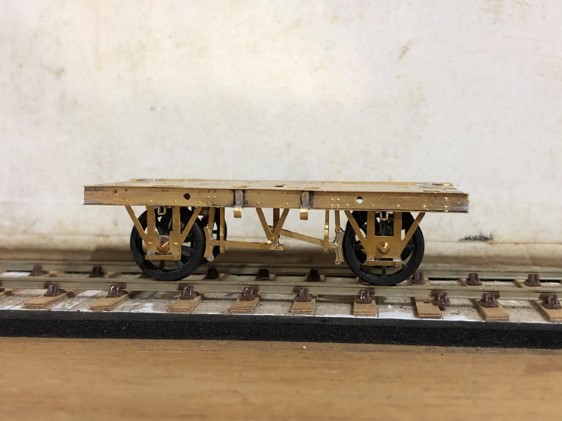
To fit the solebars the instructions advise sliding two pieces of wire through BUT the screws for the adjustable irons will restrict the wire. I loosen the screws and push wire through. My approach now is to use the wire as a guide and solder the solebar to the underframe.
At this point, I assemble the body. The mouldings are getting on a bit now and usually need a bit of tidying up. Remove the central door bang and clean up and remove the buffer bases and clean up. Enlarge the holes to take the Mousa models bases. Check they assemble square and tidy the corners up. Now is a very good time to check the fit of the body against the underframe. Some adjustment will be needed but when happy with the fit measure the inside dimensions for the floor. I glue the floor to the underframe and once cured I fit the body by gluing to the floor. Ensure all is level and square.
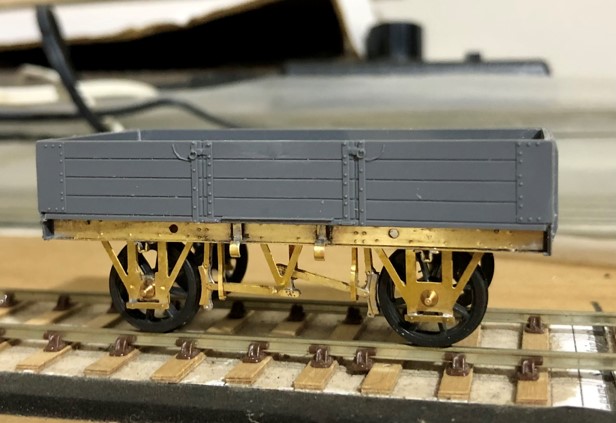
At this point, we have a complete body, minus the detail parts and brake gear. Fold the brake gear up, solder and clean the edges up. Fit in position and run a length of length of 0.7mm wire through the hole in the V hanger and solder from the inside. Only a touch is needed. Cut the wire to length, leaving enough for the brake lever. The 3d prints will need a clean before use. Check the clearance of the bearings at the moving end. The back of the axlebox will need opening out. I use a dental burr in a Dremel – carefully. Double check the fit and when there is no rubbing or interference with the bearing movement secure the castings with superglue. The buffers are printed with the holes in them, but they may need a little opening out. Check the movement of the ram, and when all is ok secure the tail and check the springing action. Then, fit the buffers. For the 3 link couplings I use the Exactoscale drawhook. While I do like to spring buffers if possible, I fix the hook in place and solder at the rear with a piece of brass wire. Fit the coupling links – I have now run out of Exactoscale ones and switched to Brassmasters. Finally, I cut squares – about 2mm x 2mm of 5 thou material to use as the door bangs. After this, the lever and guide. There is a very useful forming guide on the etch. The final item that you can fit is a tarpaulin bar and things get a little tricky here. I have now used up my stock of Parkside spares and only have some Southwark Bridge etches to assemble and these are no longer available. So, this is an area that needs further investigation by me.
At this point, it is a good time to look over your work and be critical. Better to fix things that annoy you before going any further because the next stage makes correcting errors far more of a problem.
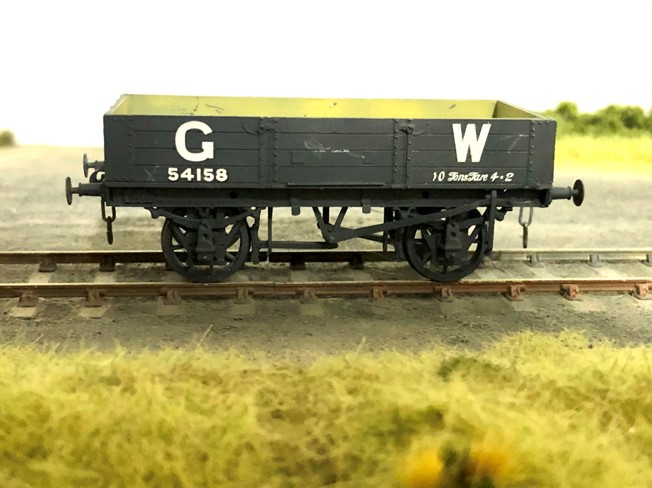
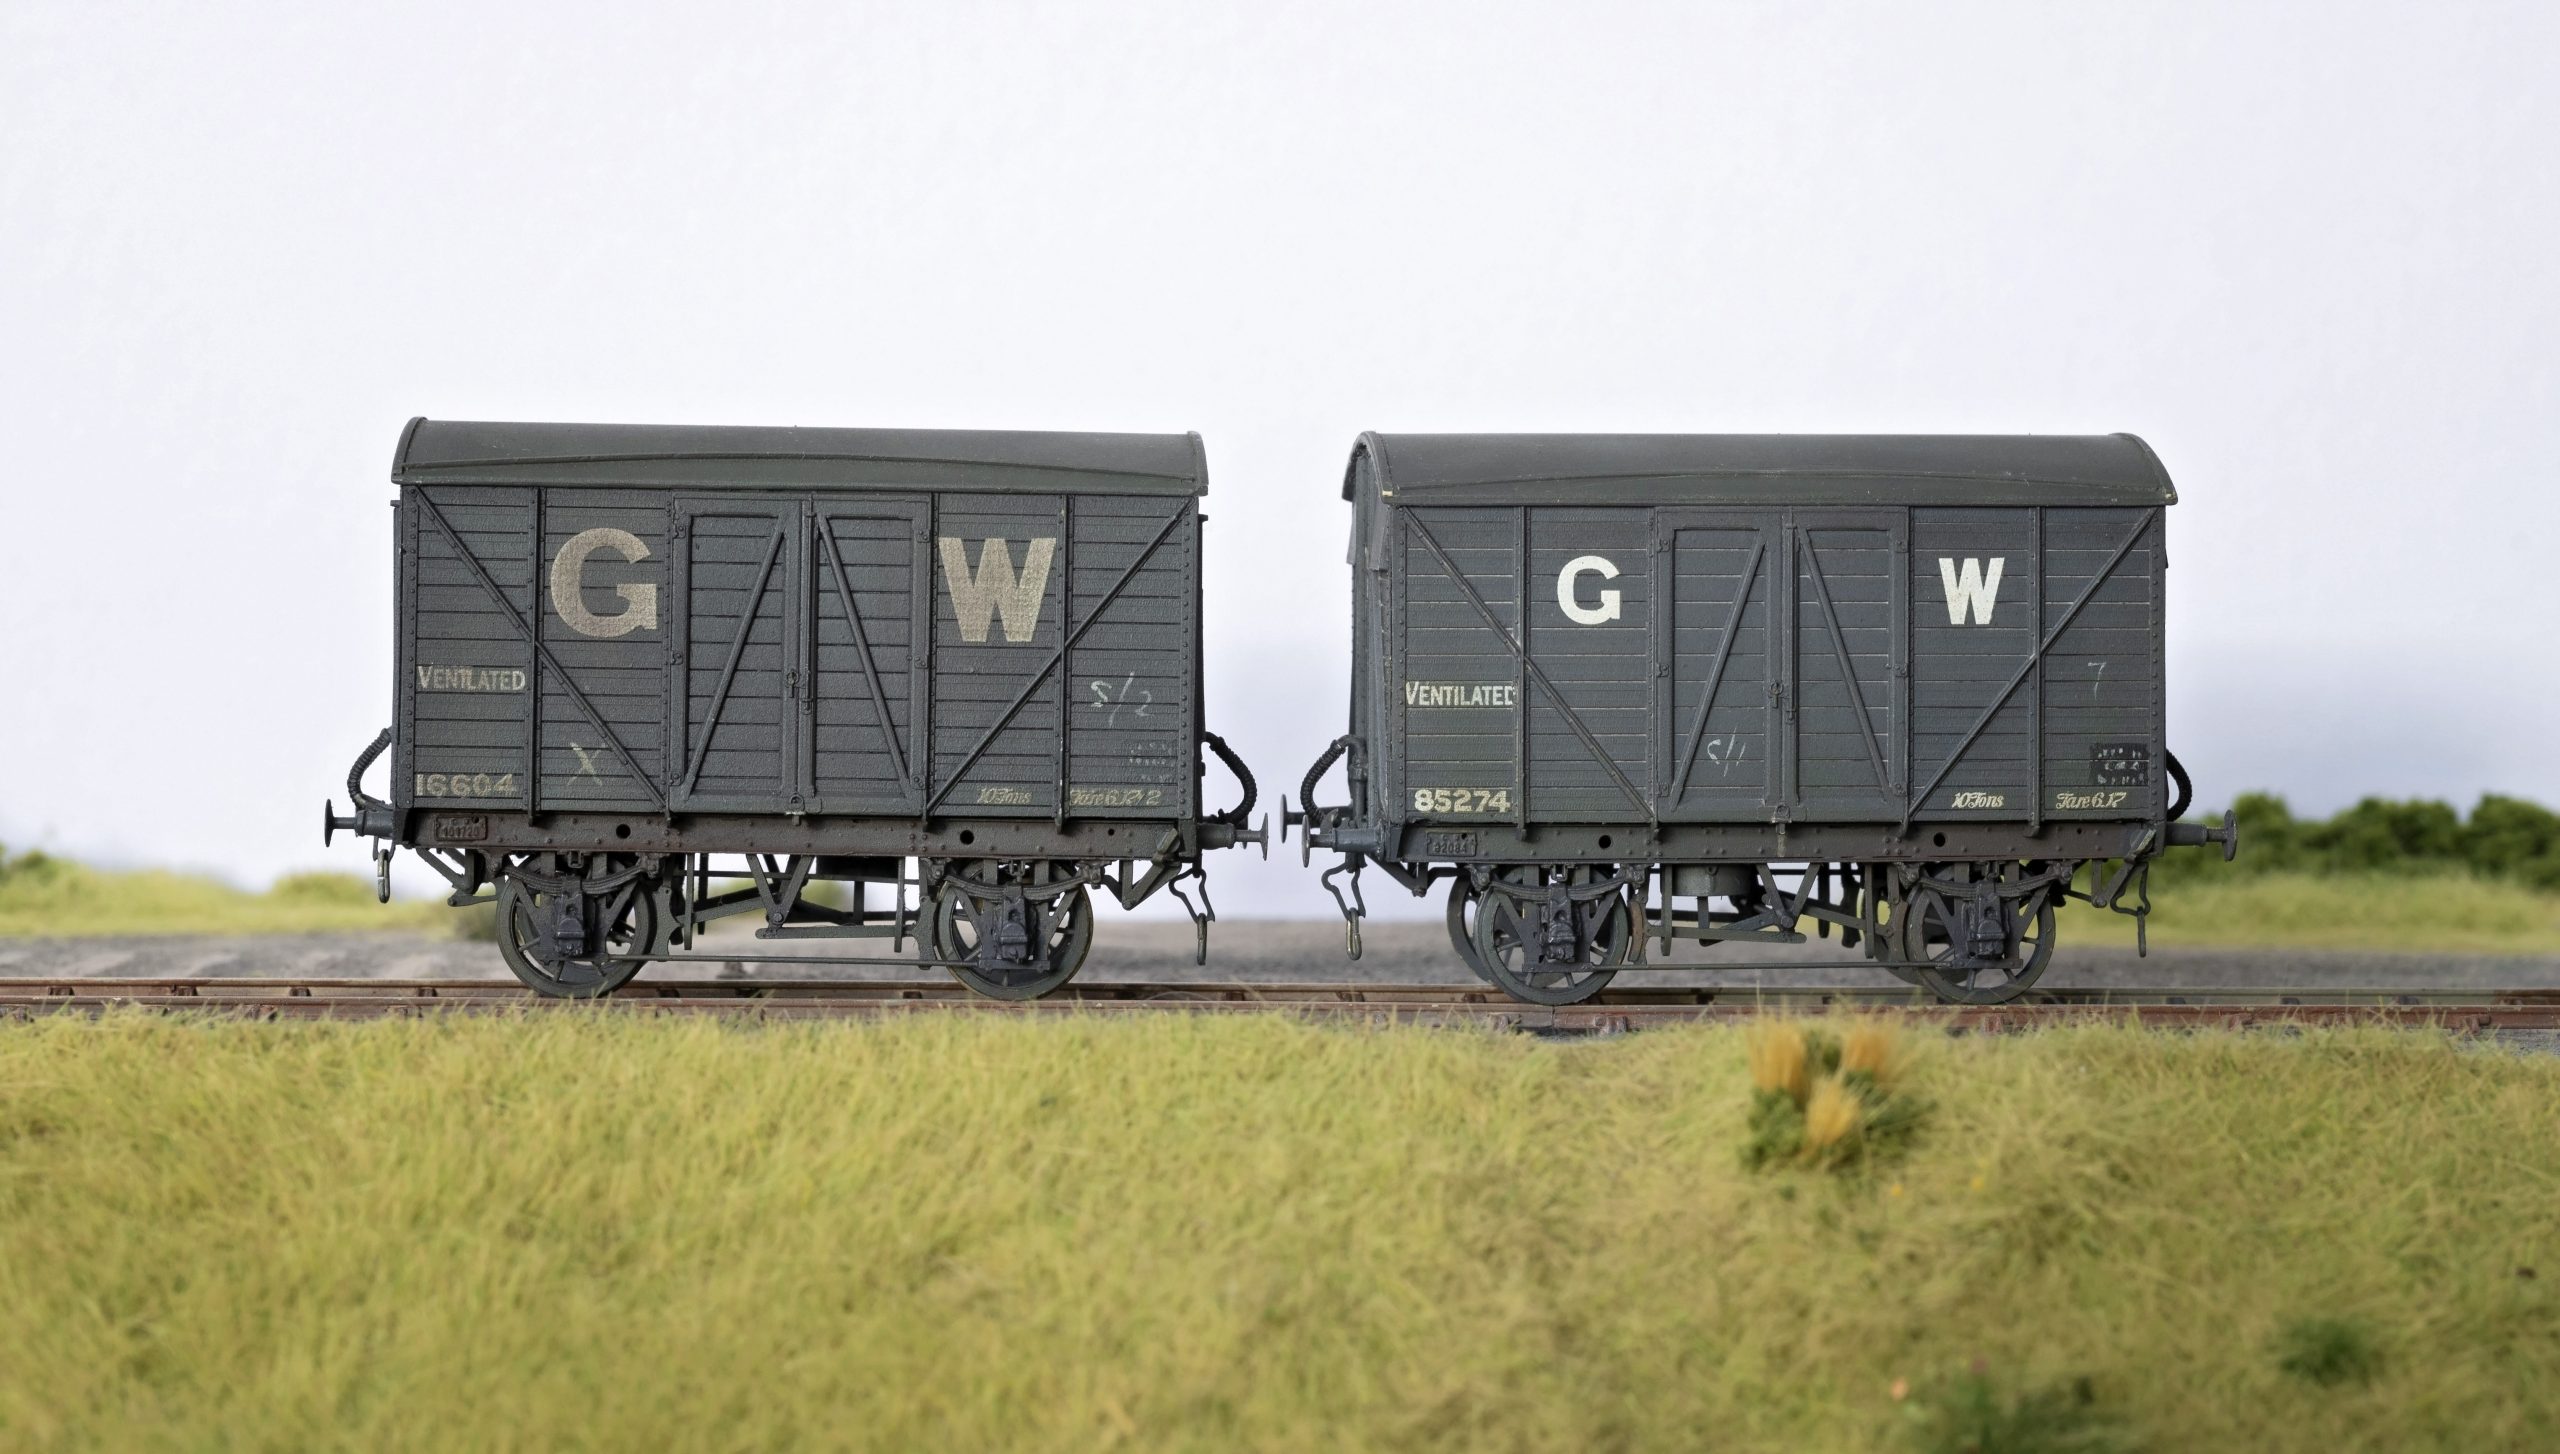
Painting, transfers and weathering.
I use both enamel and acrylic paints but for the last few years I have mainly used acrylic. I do not really pay a great deal of attention to what grey I use for GWR wagons, as long as it is dark grey. I like Panzer Grey let down with a little white and cream and lately I have used Valejo Basalt Grey (70.869) again let down with a little white and cream. I like adding a bit of cream to the mix because it balances out the blue cast that a lot of grey paint exhibits. The wagons are first primed and then left to dry. This is important because it gives the paint a chance to harden. After sitting a while, I will mix a little of my grey mix and paint a few wagons. Typically, I try to do two or 3 wagons in one go and then mix a new lot of paint from scratch. This way I get small variations in the grey which I think sits better when you have a number of them together. After the grey has dried, spray gloss in the areas where the transfers will be applied.
There is a good selection of transfers available however not many do the 25” GW letters which are needed for the early 1920s. I use Fox and Railtec transfers, though I am sure there are others I have not seen or tried yet.
For the other lettering I use Fox transfers and find them to be good, although it has to be said that cutting and applying individual numbers (and the tare weights) is a very special kind of painful. It is worth taking your time and adjusting the numbers to get the spacing and positions all matching.
After the transfers are all set, a coat of matt varnish finishes things off.
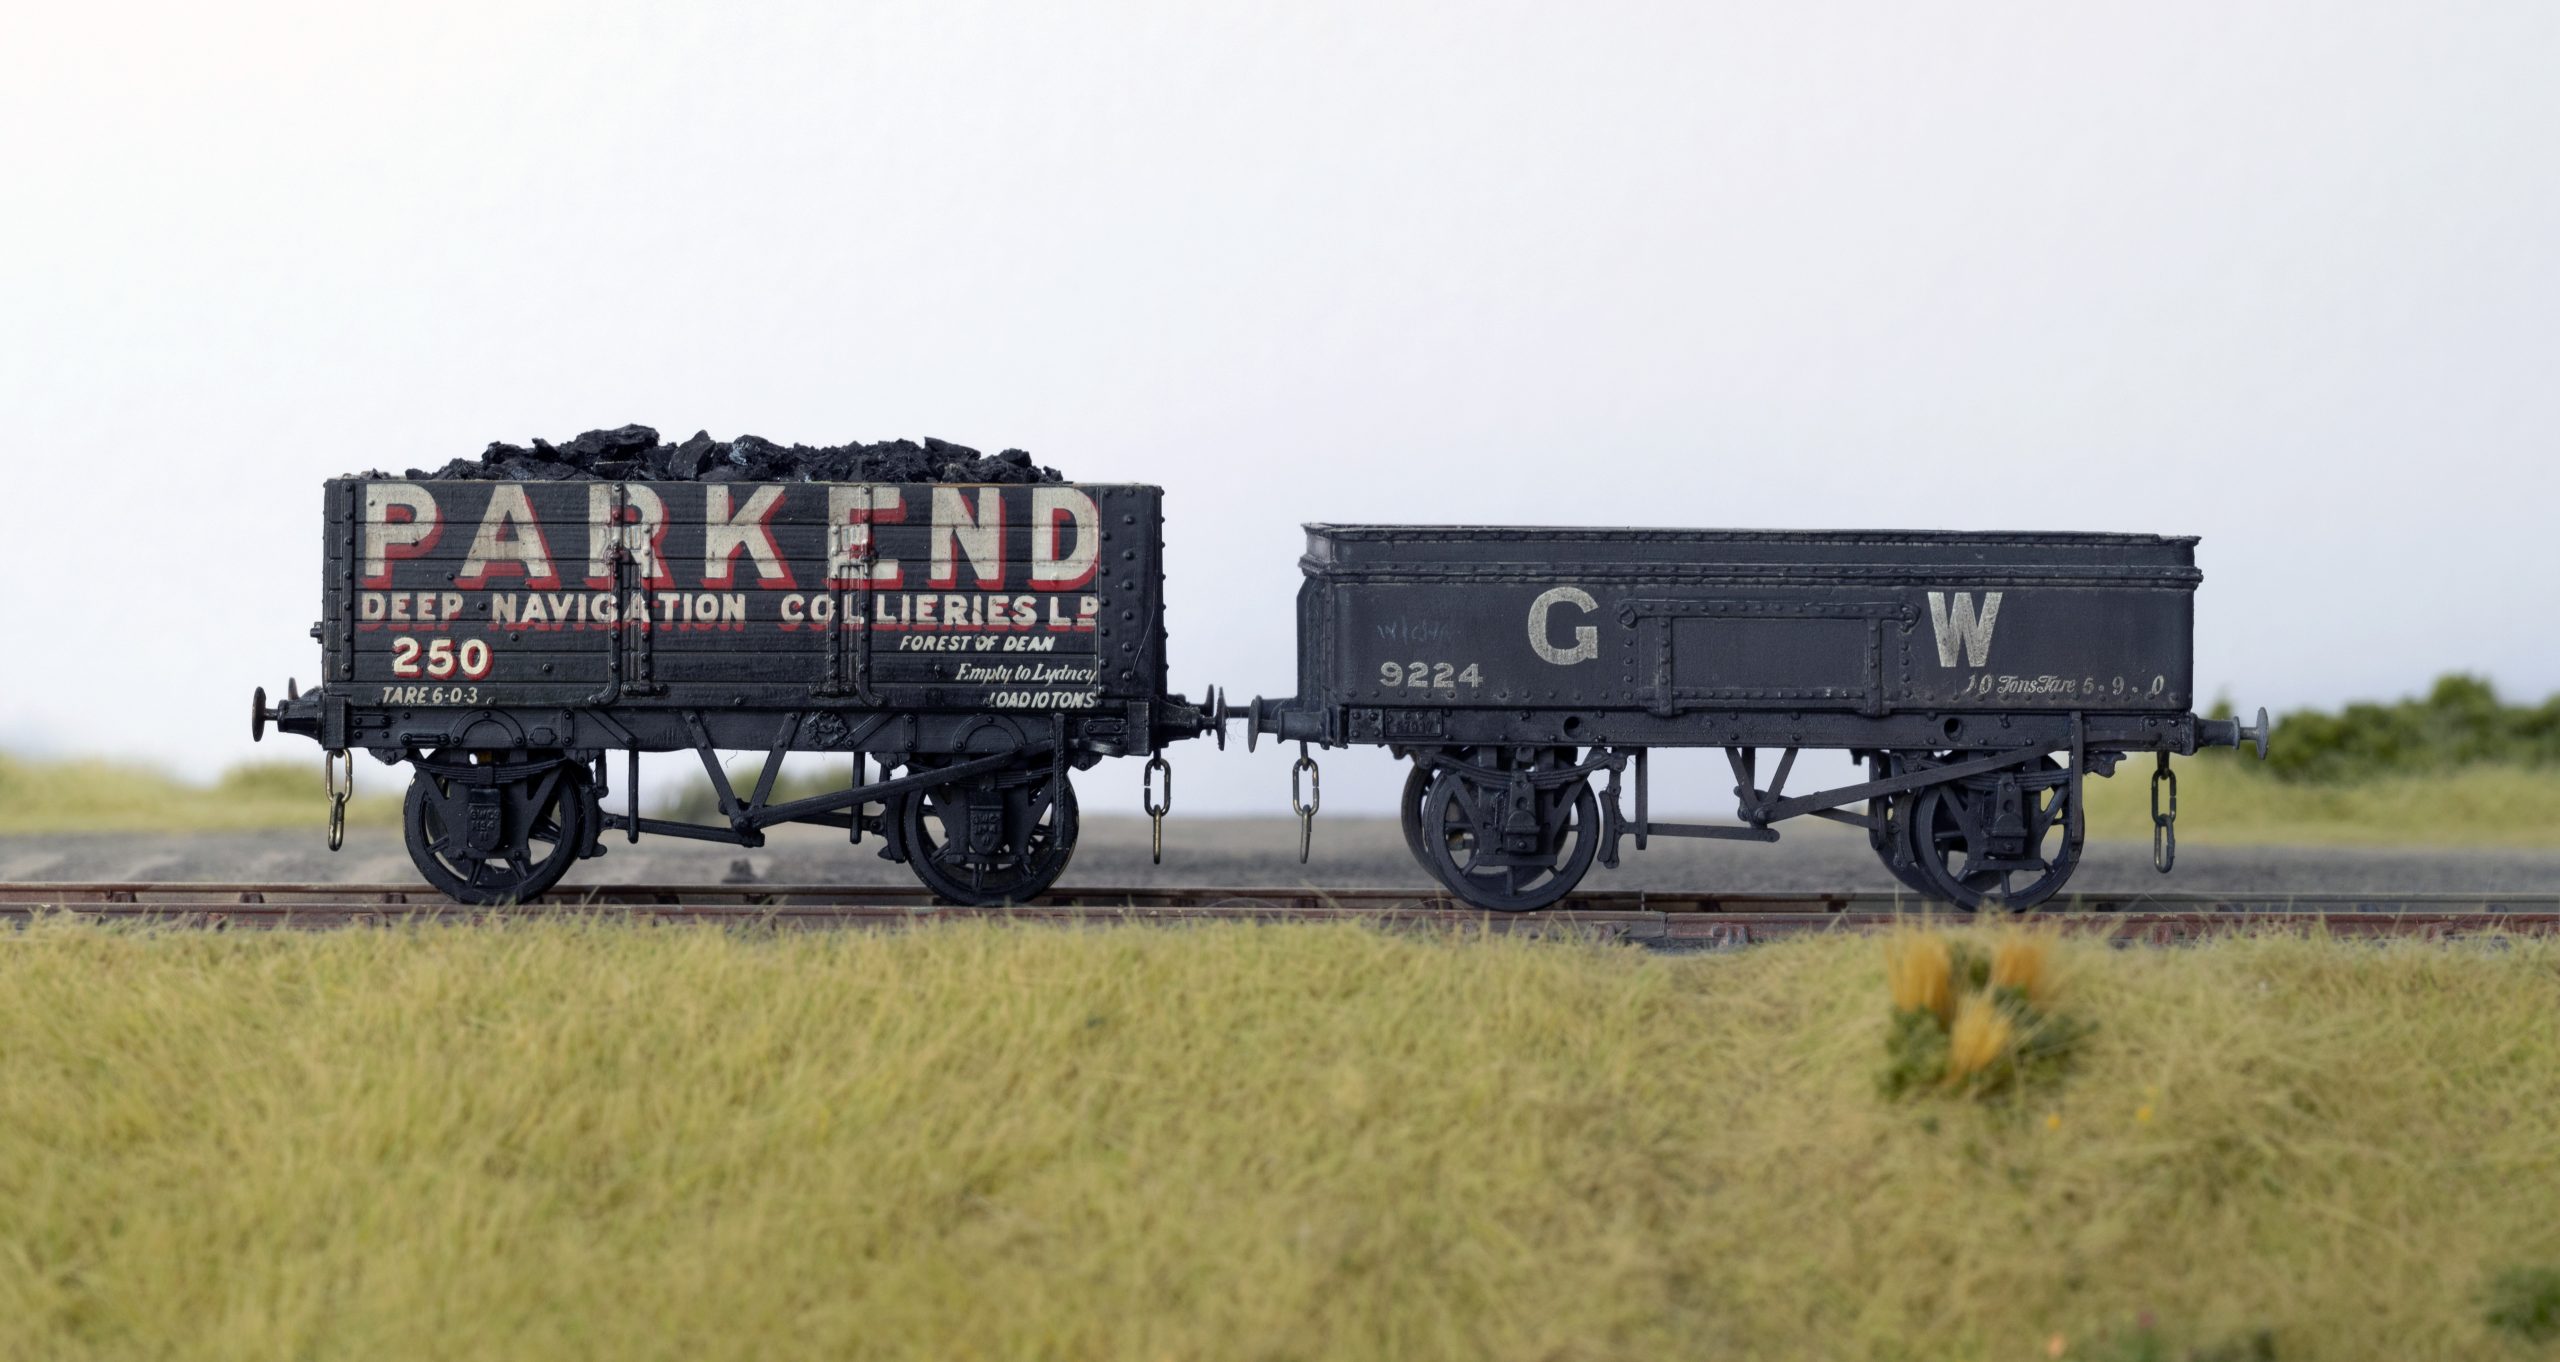
The final thing to do is weathering and the best thing to do is look at photographs from the era you model. For the 1920s this means trying to decipher B&W images, but my overall impression is of work soiled wagons rather than decrepit. While you can see some evidence of wagons being repaired, I have not seen any photos of unpainted timber being used. When I weather wagons, my approach is to try to achieve a muted finish and have a relatively uniform appearance. To do this I mainly use an airbrush with some washes and dry brushing.
The airbrush is great for dirt and road grime, but I like washes for things like rain streaks. Rather than cover the whole wagon with a wash, use what is referred to as a “pin wash” where you make certain to only apply the wash to a recess or a specific area. Another useful technique is a filter wash where you apply a slightly different colour was to a particular area – one plank as an example. Be careful to keep it confined to a structured area and only use a small brush to apply. Weathering powders are also good but be very careful when trying to fix them. I tend to use them for smaller applications where they will not be impacted by handling. Powders can also be mixed with isopropanol for some effects and thinly brushed on. The key with anything though – especially in 4mm scale, is restraint.
One final thing that can be done is shunters scribbles and marks. This is seen on many wagons and vans and is a simple thing to do and makes a big difference. I sometimes use white paint and a fine brush but lately have been using a chinagraph pencil sharpened to a very fine point.
That really is more than enough writing from me, now for some completed wagons…

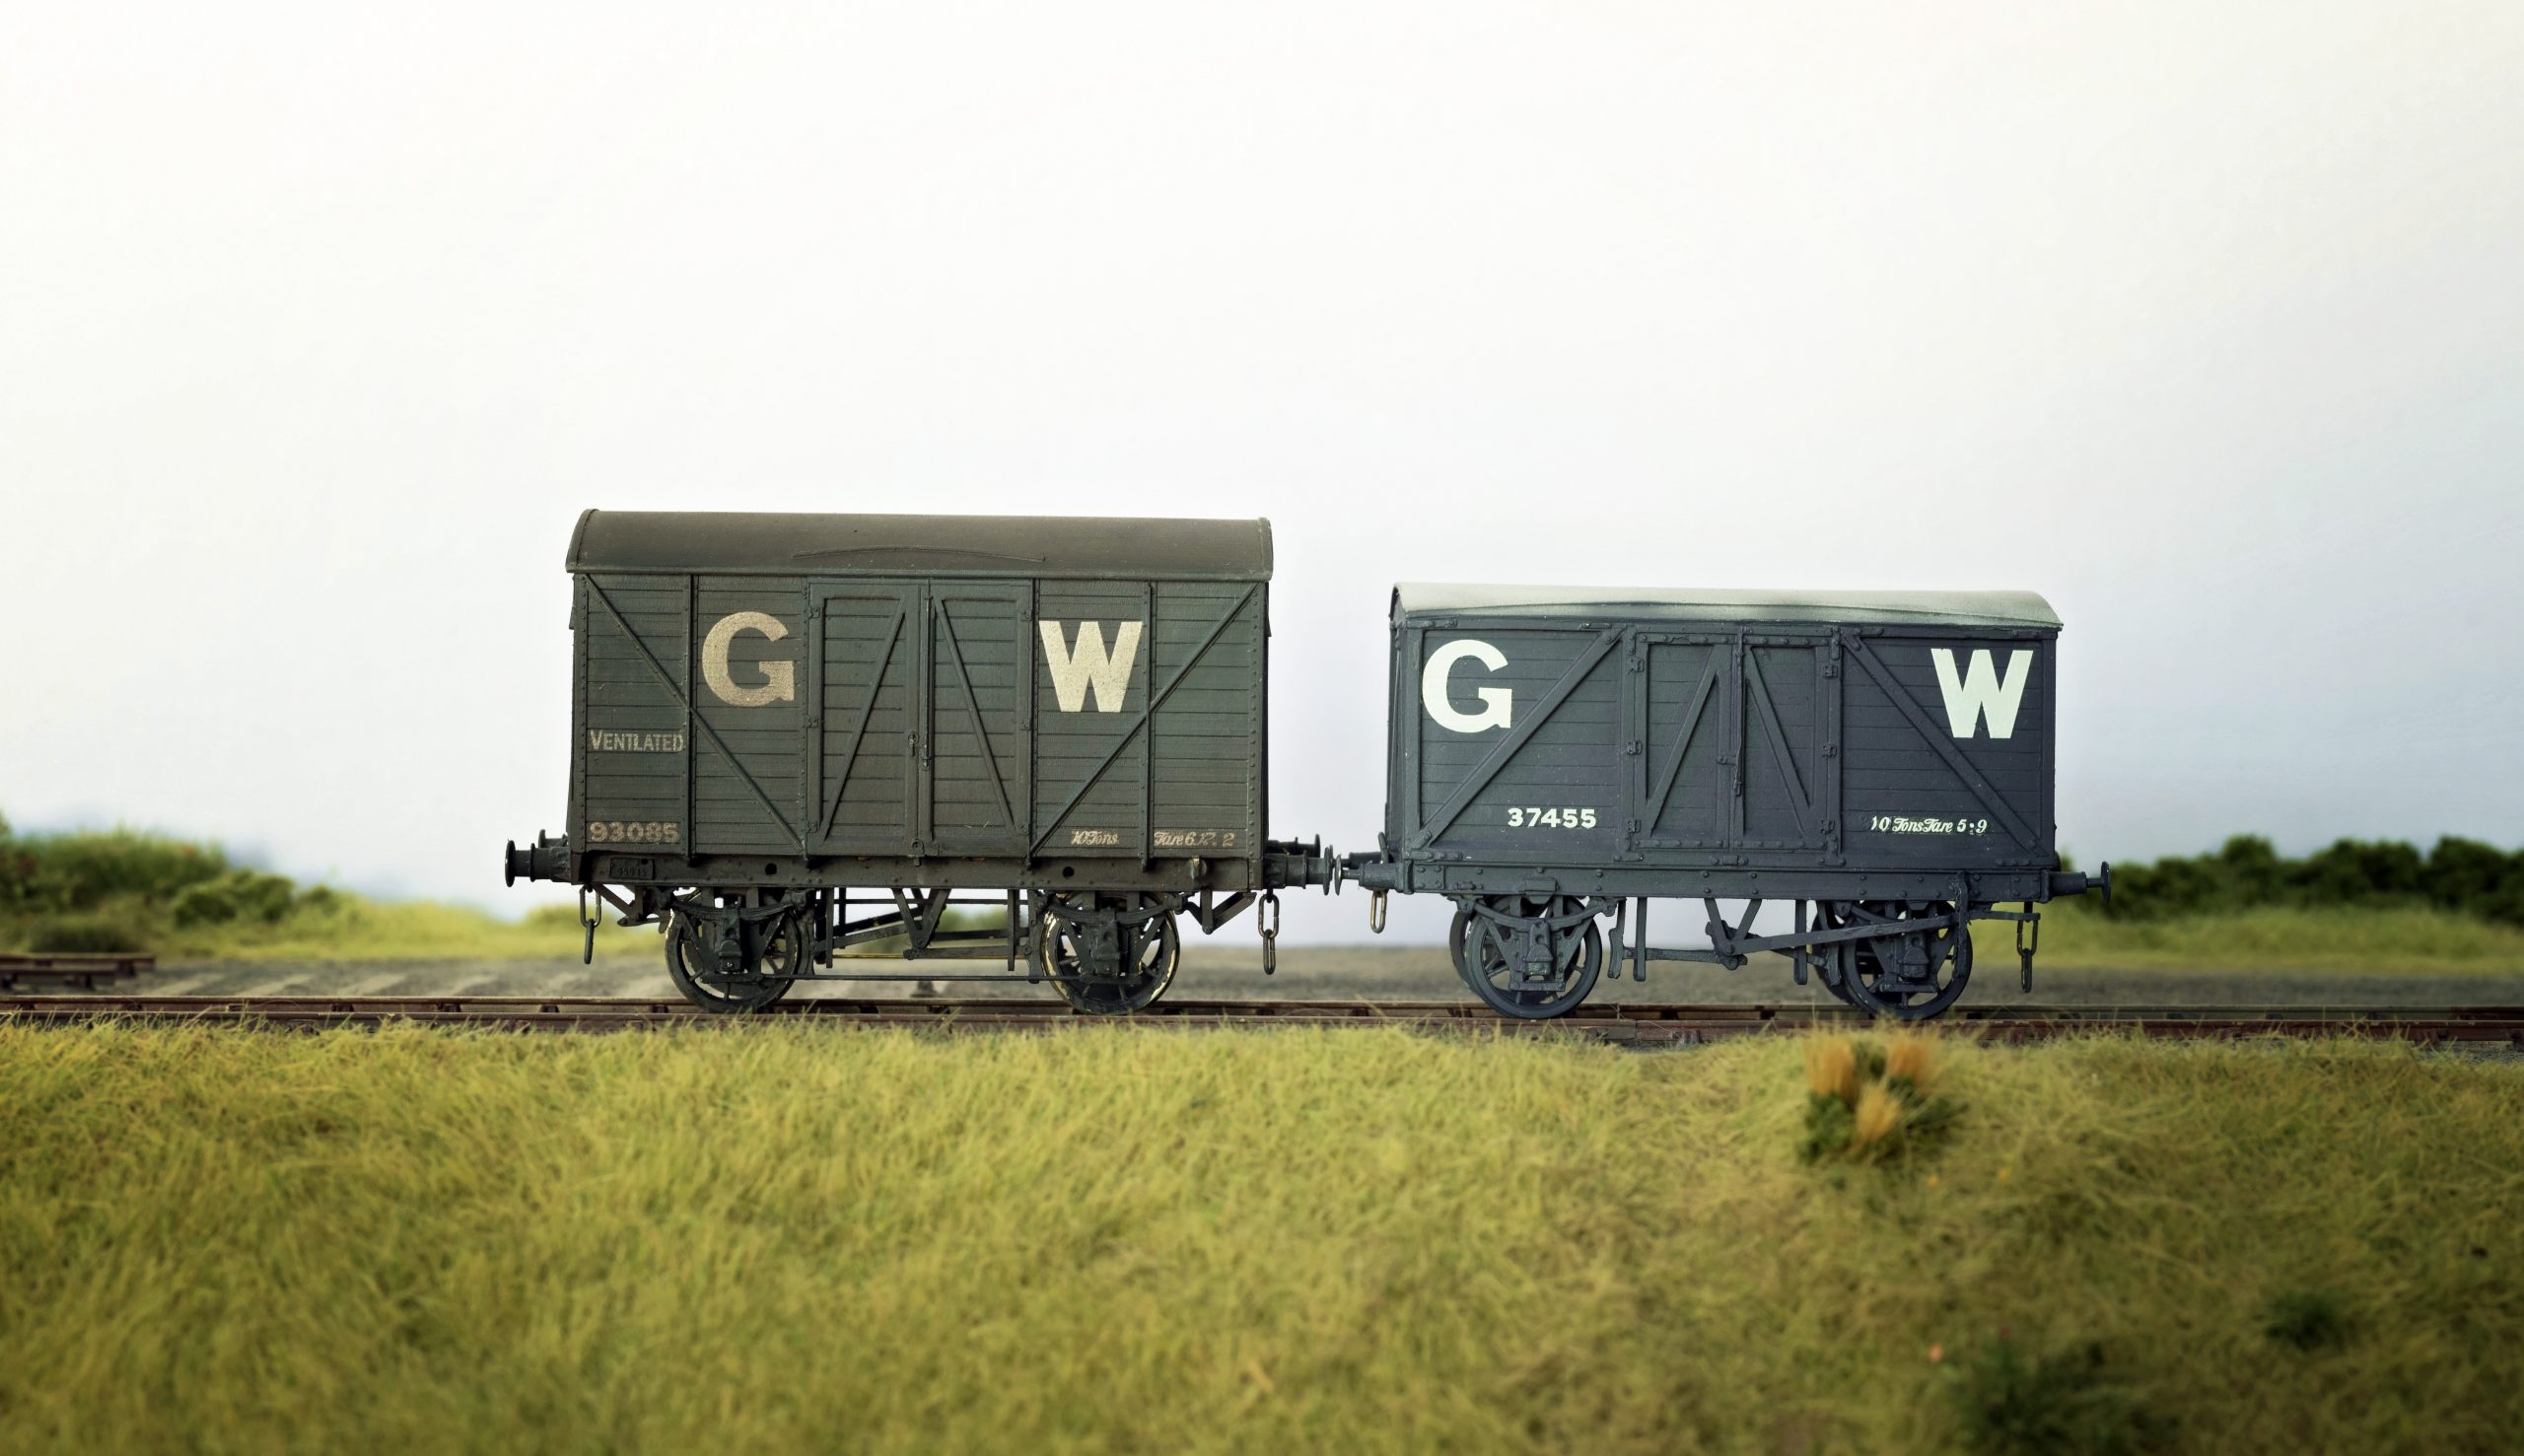

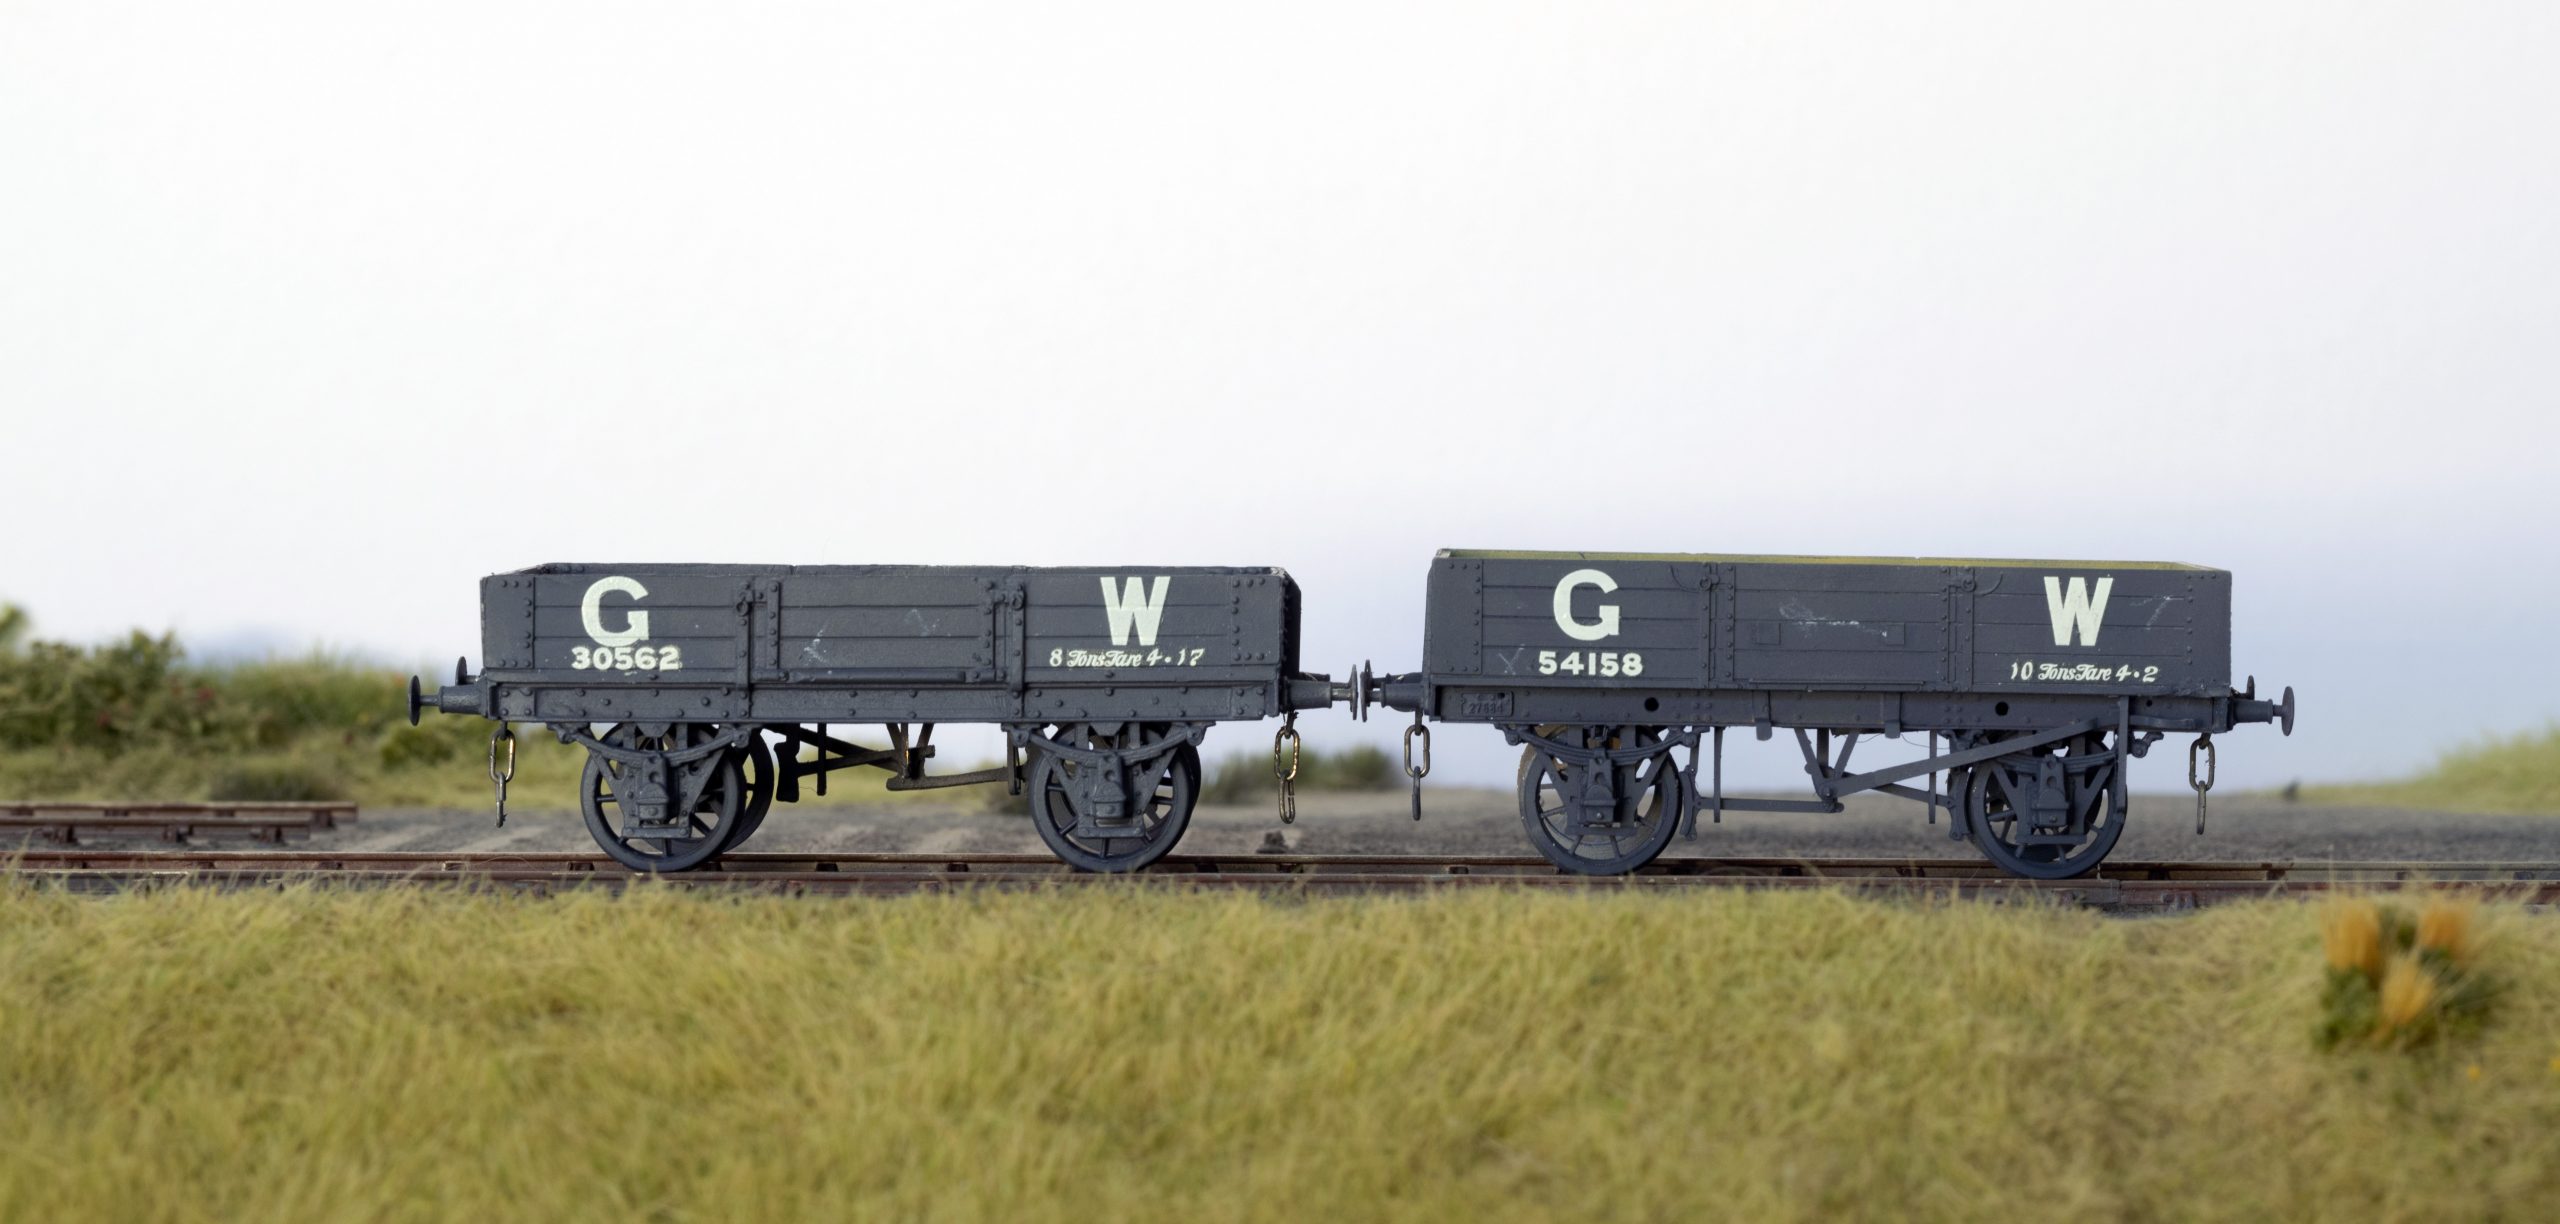


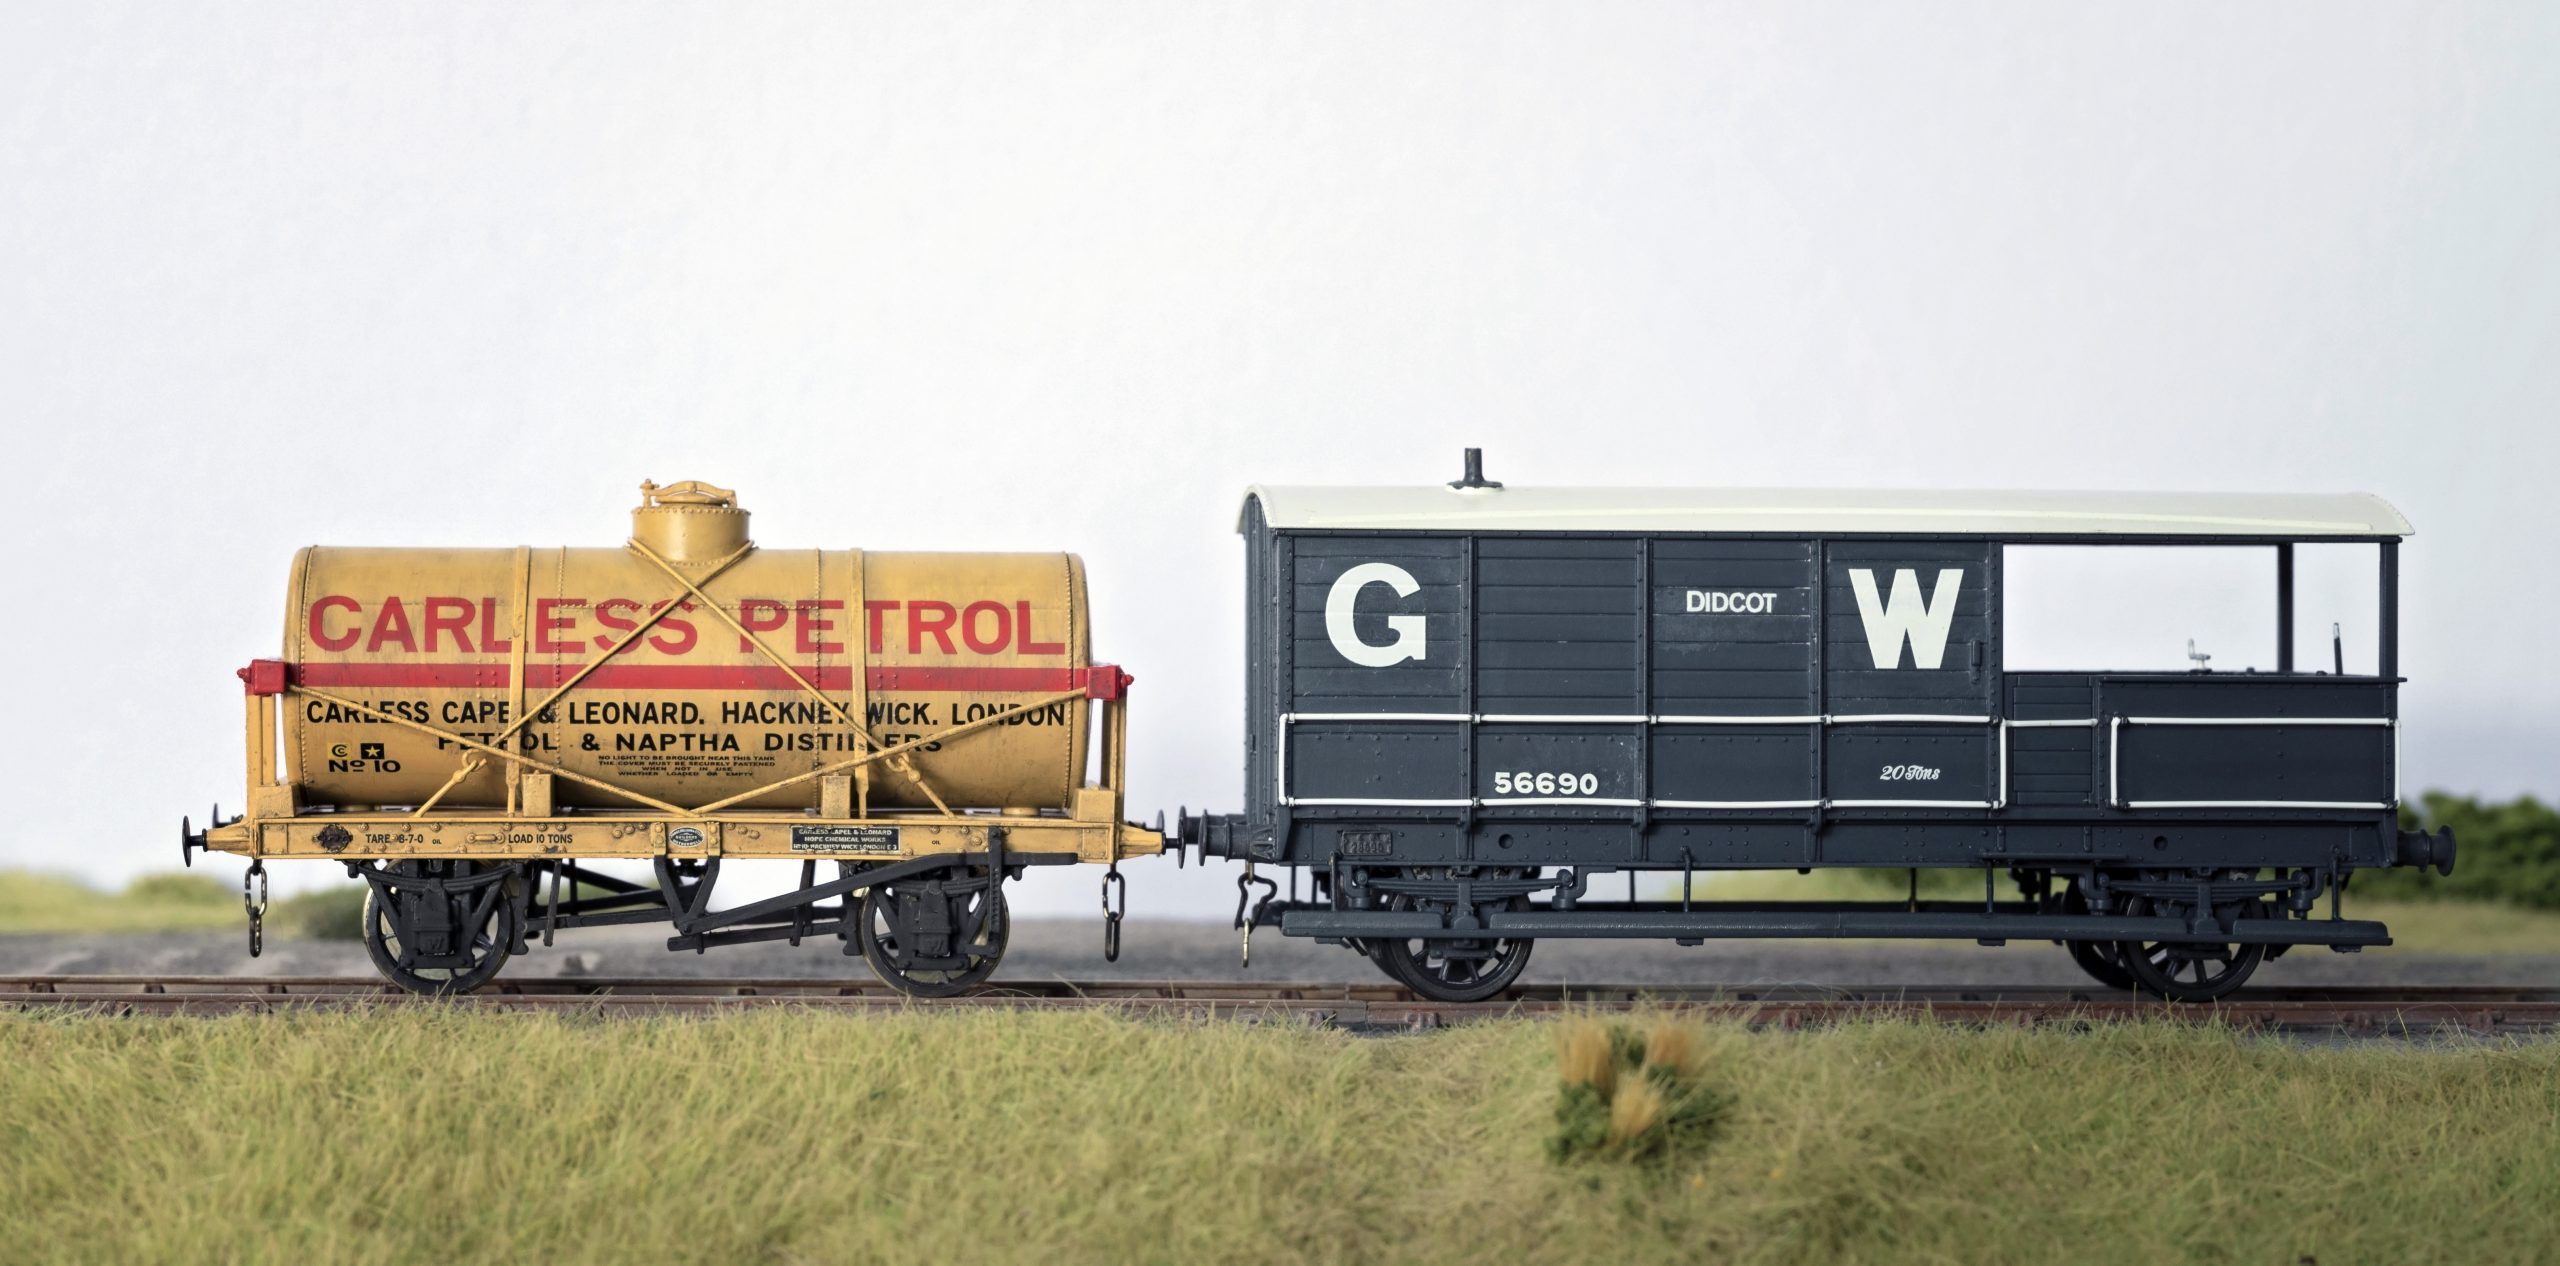
A PDF (2MB)of all the photos of the completed wagons can be found here.
Craig has his own workbench threads on the Scalefour Society forum here.